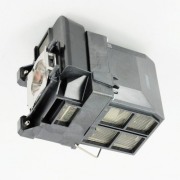
Projector Lamp ELPLP74
Origin: China / Japan
Lamp Type:: 215W UHE
Part Number: ELPLP74
Fit for Brand: EPSON
Payment Terms: T/T, Western Union, , PayPal
Delivery Detail: 1-3 days By DHL, FEDEX, EMS etc.
·Epson ELPLP74 replacement projector lamp / bulb
·ELPLP74 repalce projector lamp
ELPLP74 repalce projector lamp
The projector keeps track of the number of hours the lamp is used and displays this information in the
projector's menu system.
Replace the lamp as soon as possible when the following occurs:
• The projected image gets darker or starts to deteriorate
• A message appears when you turn on the projector telling you to replace the lamp
• The projector's lamp light is flashing orange
Replacing the Lamp
Before you replace the ELPLP74 lamp, let the projector cool down for at least one hour so the lamp will not be hot.
Warning: Let the lamp fully cool before replacing it to avoid injury.
You can replace the lamp while the projector is mounted to the ceiling, if necessary.
1. Turn off the projector and unplug the power cord.
2. Allow the projector lamp to cool down for at least one hour.
3. Use the screwdriver included with the replacement lamp to loosen the screw securing the lamp
cover.

Warning: If the ELPLP74 lamp is broken, glass fragments may be loose inside the lamp chamber. Be careful
removing any broken glass to avoid injury.
4. Slide the ELPLP74 lamp cover out and lift it off.

5. Loosen the screws securing the lamp to the projector. The screws do not come all the way out.

6. Lift up the ELPLP74 lamp handle and gently pull the lamp out of the projector.

Note: The lamp(s) in this product contain mercury. Please consult your state and local
regulations regarding disposal or recycling. Do not put in the trash.
7. Gently insert the new lamp into the projector. If it does not fit easily, make sure it is facing the right
way. Press the handle down.

Caution: Do not touch any glass on the lamp assembly to avoid premature lamp failure.
8. Push in the lamp firmly and tighten the screws to secure it.

9. Replace the lamp cover and tighten the screw to secure it.

Note: Be sure the lamp cover is securely installed or the lamp will not come on.
If you have special requirements, please contact us for a quote.

SEE More Projector Lamp For HOT SALES
· SP-LAMP-LP7E projector replacement lamp/bulb for INFOCUS
· AN-XR10L2 replacement projector lamp / bulb for SHARP
· BQC-PGA10X/1/ AN-A10LP replacement projector lamp / bulb for SHARP
· EC.J3401.001 replacement projector lamp / bulb for Acer
